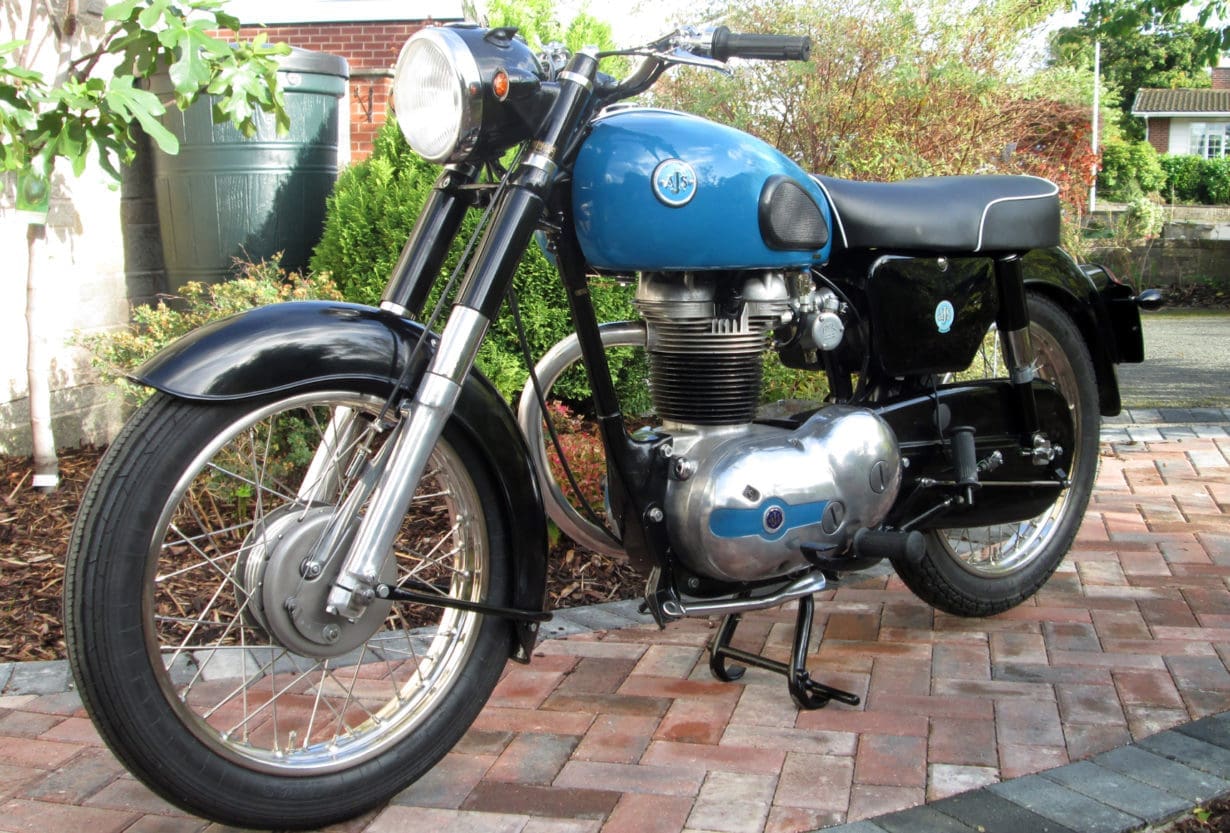
During lockdowns, Simon Huntington assembled an AMC 350 lightweight from an assortment of scrap metal. When you read the July22 issue of RealClassic magazine (RC219), you’ll be entertained by Simon’s bold rebuild of an AJS basketcase. He’d never even seen one of these machines before he bought his Model 8, in boxes. There were, erm, ‘significant challenges’ to be overcome. And once Simon had successfully returned this classic lightweight to the road, he realised it lacked something essential…
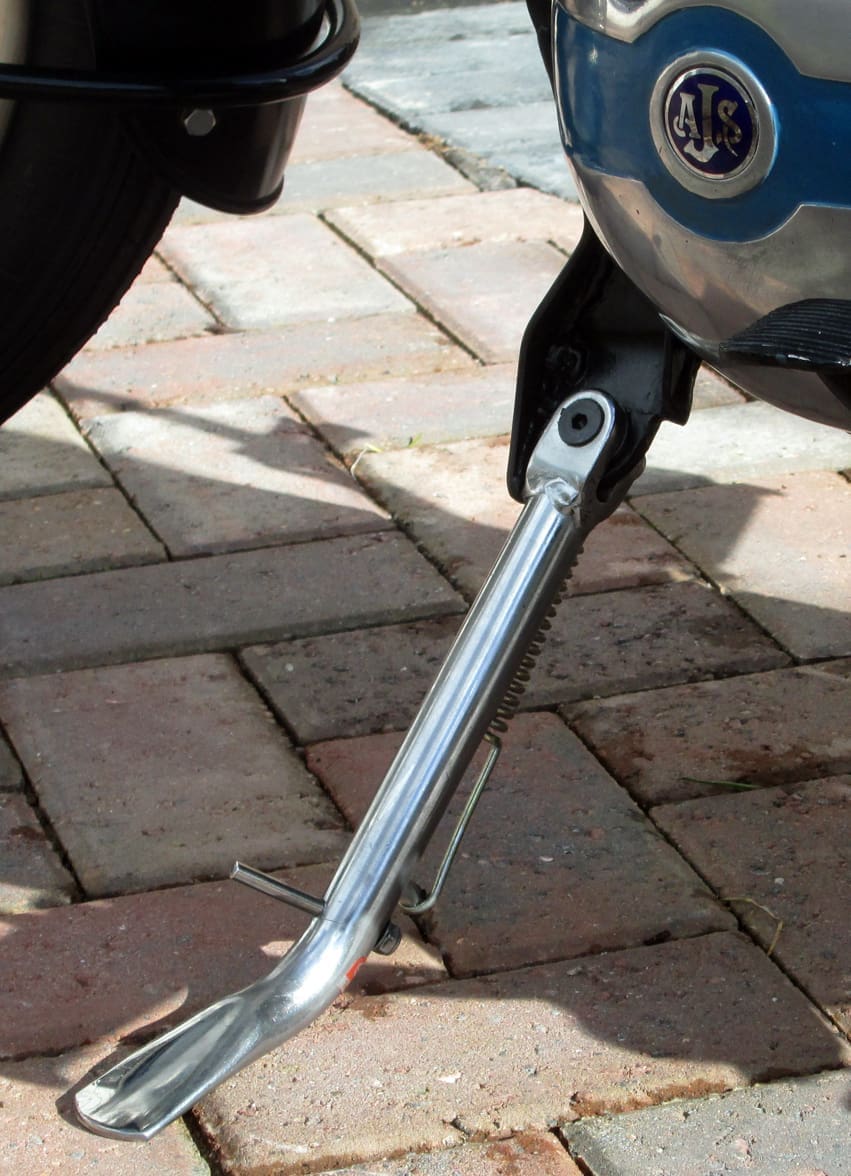
I soon wanted a sidestand. There’s no handhold to pull the AJS onto the centrestand other than the edge of the seat. The few I’ve seen advertised were quite expensive, so I thought I would have a go at making one. I decided to copy the location of the spring peg and stops from another bike so that my home-made stand would remain in the retracted or deployed position safely. I found a chromed Royal Enfield Electra stand online complete with bracket and spring for the princely sum of £12 delivered. It’s robust but inelegantly made. It’s basically a heavy bracket with mounting holes to suit the Enfield frame, a powerful spring and a chromed tube flattened at one end with a ‘U’ shape welded on to the other to take the pivot bolt. The welding on the bracket was rough but strong (and made me feel good about my own efforts).
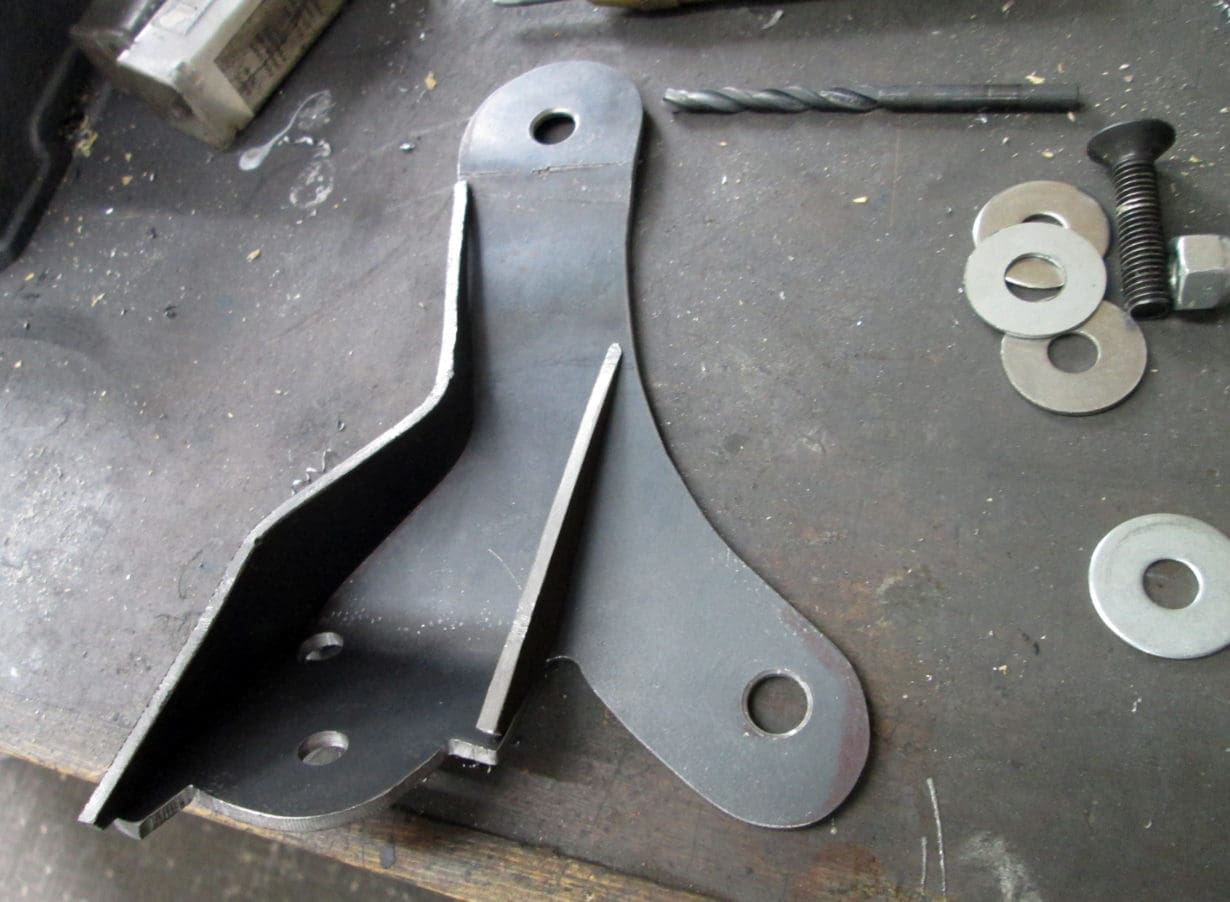
I planned to mount my stand using the crankcase attachment studs at the very front of the engine on the left side. So that I could keep the existing studs and not have to buy longer ones, I made the bracket from some 3.2mm (1/8″) steel plate. This gauge of plate would not be strong enough on its own, so I doubled up the thickness where the stand pivot attached and made some triangulation webs to brace the weight of the bike against the frame.
Enjoy more RealClassic Magazine reading every month.
Click here to subscribe & save.
I used a MIG welder, but Arc, TIG or gas would work also. Only very basic welding skills are needed and the actual welding took about 10 minutes, if that.
I measured the position of the spring fixing point on the donor stand bracket relative to the pivot point. I noted the stand end-stop locations and the pivot point angle from vertical – copying these reduces trial and error. To dismantle the stand / spring, I pushed a lot of penny washers between the coils of the spring at its maximum stretch. Closing the stand with the de-tensioned spring meant it could be removed easily. The fixing was just a standard 8mm countersunk screw and nyloc nut. I worked out the position of the stand pivot point so that it would tuck away and not catch on anything. I could have probably moved it rearward by another 10mm or so.
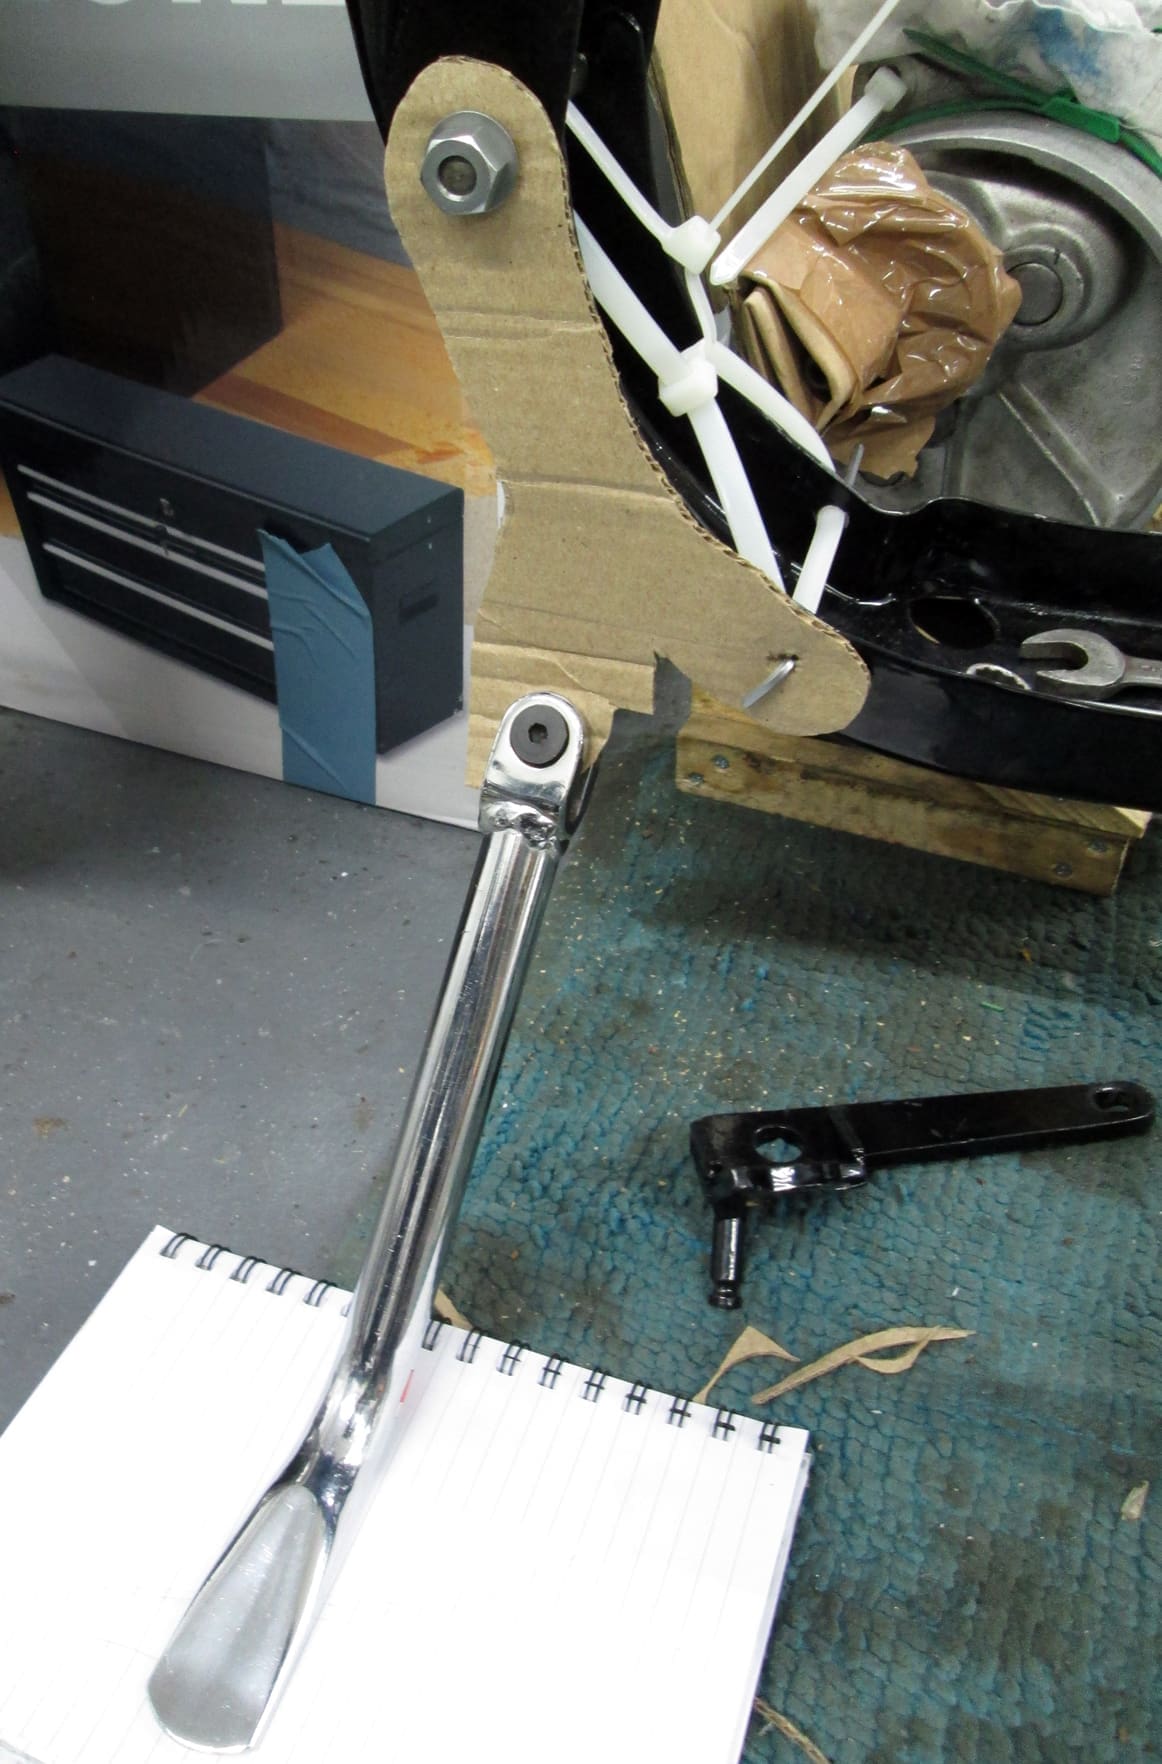
I used cardboard to make a mock-up of the bracket and get everything in the right place. I trialled the stand without the spring to check for interference and operability – obviously, it will not support the bike with a cardboard bracket, so I used wood blocks to check the angles. Transferring the cardboard design to steel, I cut it out with a hacksaw and filed the edges, then bent the lower bracket to match the angle of the donor stand. I added a second layer of steel for the pivot point which would be braced against the curve of the frame.
The pivot hole and a tapped hole for the spring locating peg were drilled. I made the peg to carry the fixed end of the spring from the top part of a pre-used 8mm socket head bolt. I cut off all but 7mm of thread and made a groove in the other end to locate the spring (the length was copied from the donor stand bracket.) It is ideal to use a lathe to make the groove, however by rotating the bolt in a drill chuck it is also possible to file a groove using the edge of a half-round file while the bolt rotates in the chuck.
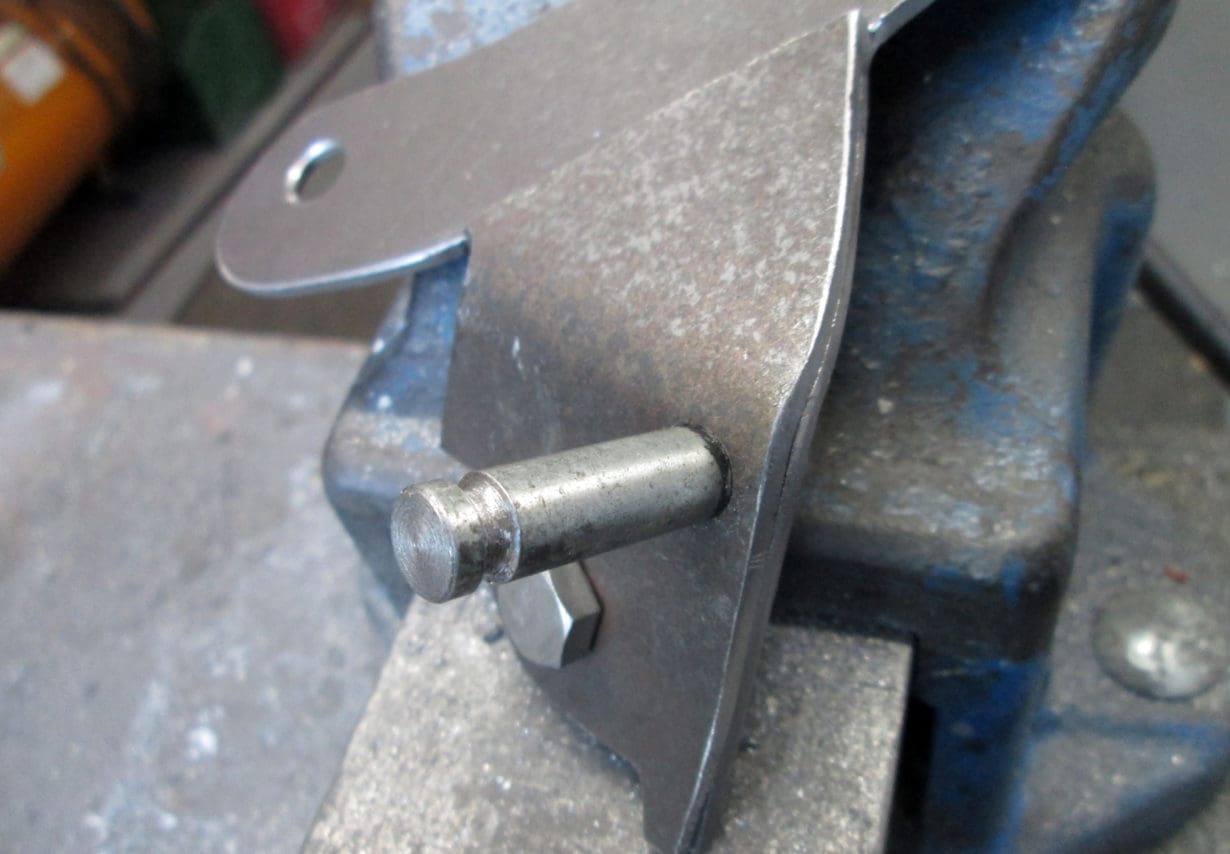
The spring peg was screwed into the tapped hole in the stand bracket and I welded the end for good measure as I should never need to remove it. The two layers of steel for the pivot point were welded together at their edges, and a 45o weld in the position where the extra layer meets the bike frame. The spring peg and the pivot bolt go through both layers of steel which adds strength.
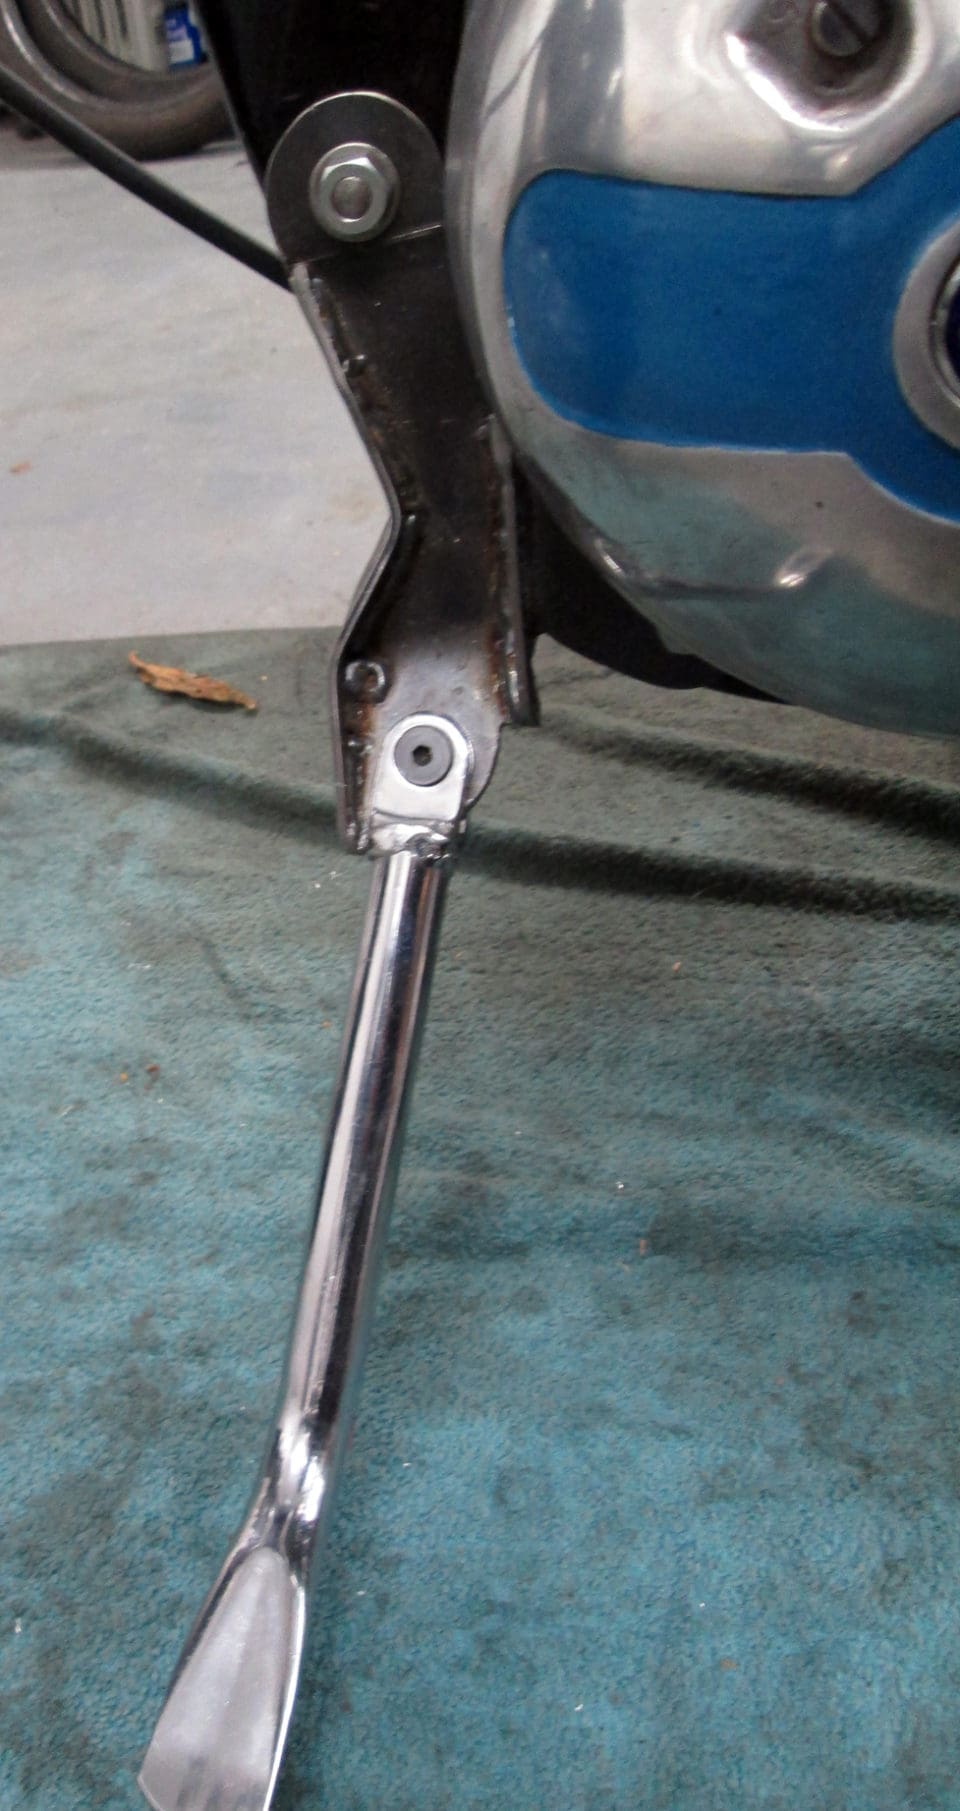
I made some triangulating webs to brace the weight of the bike and reinforce the bent part of the stand. These were welded to the front and centre of the stand bracket. A trial fit of the assembly confirmed that it worked in all orientations. I could then dismantle it again, dress the welds, chamfer the edges and paint.
The result is a stand that fits, works and is unobtrusive, for £12, a few bits of scrap material and an enjoyable day in the shed. This method should work for any bike that only has a centrestand. It is a simple bit of metal work for a rainy day and is well within the capabilities of anyone with a hacksaw, a few files and a drill. If a thicker gauge of steel was used for the bracket and longer engine mounting studs, it should be possible to eliminate the welding.
——
Words and photos by Simon Huntington
TO READ the full story of the rebuild of Simon’s AJS, order the July22 copy of RealClassic magazine – available to as a digital issue or delivered to your door…