Stu Thomson is refurbishing an unusual single-cylinder Italian sportbike. Last time he sorted out the frame and swinging arm. This time he dives into the engine room…
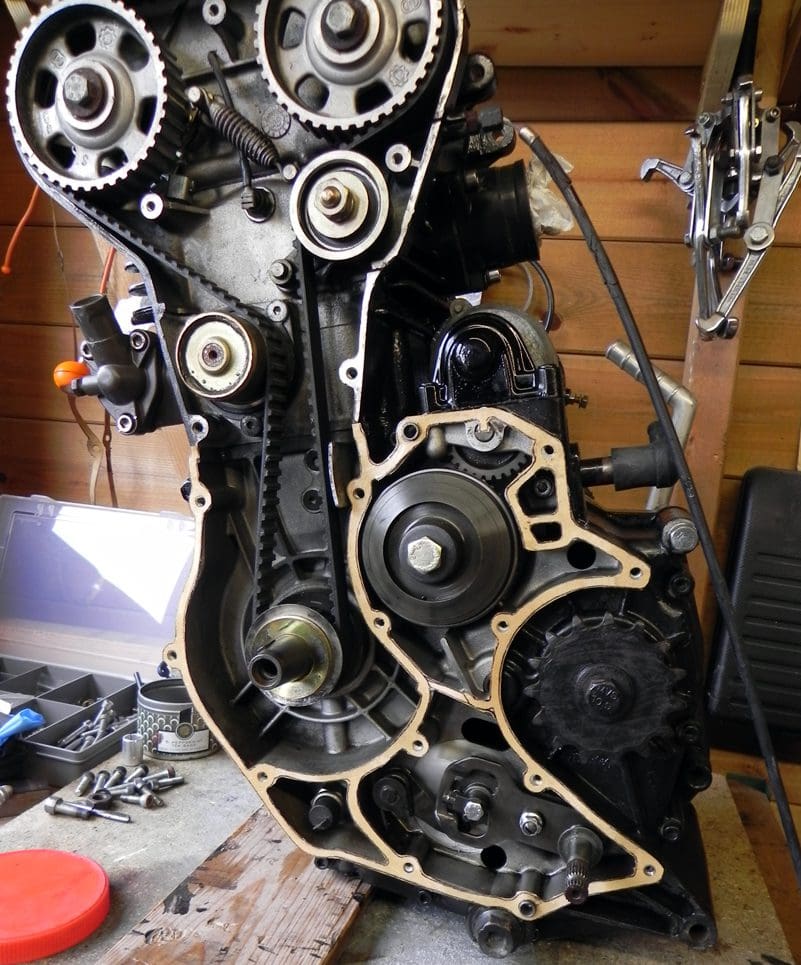
The engine / gearbox is described as a water-cooled, short-stroke, 4-valve, 5-speed, dohc unit with belt drive to the cams, with spring tensioning. The back side of the belt also drives the water pump which is a rather strange cantilever design. On some machines this has apparently given some issues. It has a mechanical seal and two bearings. If the seal fails then the bearings fail and then oops…
Correct cam belt tension is critical to ensuring a long life of the pump. It needs to be just enough to drive the pump but not too much to overload it. New pumps are £300 (if you can find one) but can be repaired / rebuilt with care. The pump is a pressed-up item with mechanical seals and sealed bearings. An Italian engineer has recently designed a pump with what I think is a better, rebuildable design and they may be available to purchase after initial testing is finalised. If a design needs improving for an Italian bike there is usually an Italian engineer ready for the challenge!
Enjoy more RealClassic Magazine reading every month.
Click here to subscribe & save.
This model has the single 36mm Dell’Orto pumper carb. The earlier 350 Dakota machines had two, mechanically linked 25mm Dell’Ortos to improve low-down torque; one carb starts off and then the second opens up for performance.
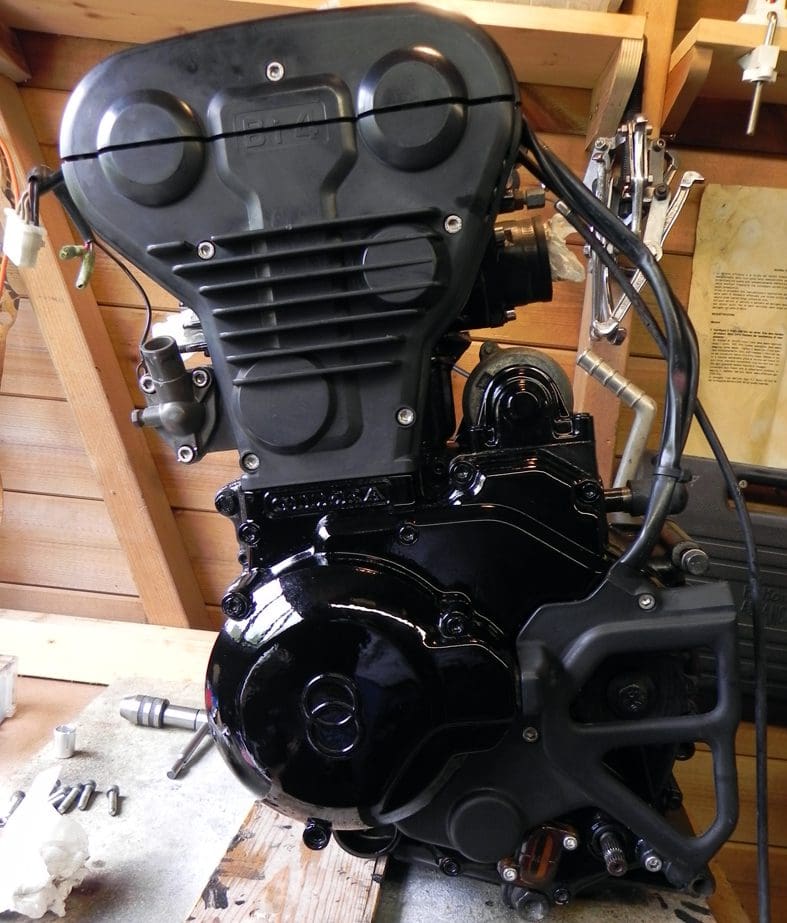
When I ran the bike after purchase the engine sounded good. It was very quiet, burned no oil from the exhaust, ticked over well and was full of clean-ish oil. A quick cam inspection suggested that the inside of the engine was really well looked after, no scoring on the cams. Not so however for the outside. These days most manufacturers have engine coatings sorted, but in the late 1980s and early 90s the prep seems to have been minimal. My 1998 Yamaha SZR had the same issue. The paint seems to fall off – from being applied over a very soft, non-etch primer – and when I look at the alloy castings under the paint there is quite a bit of oxidisation.
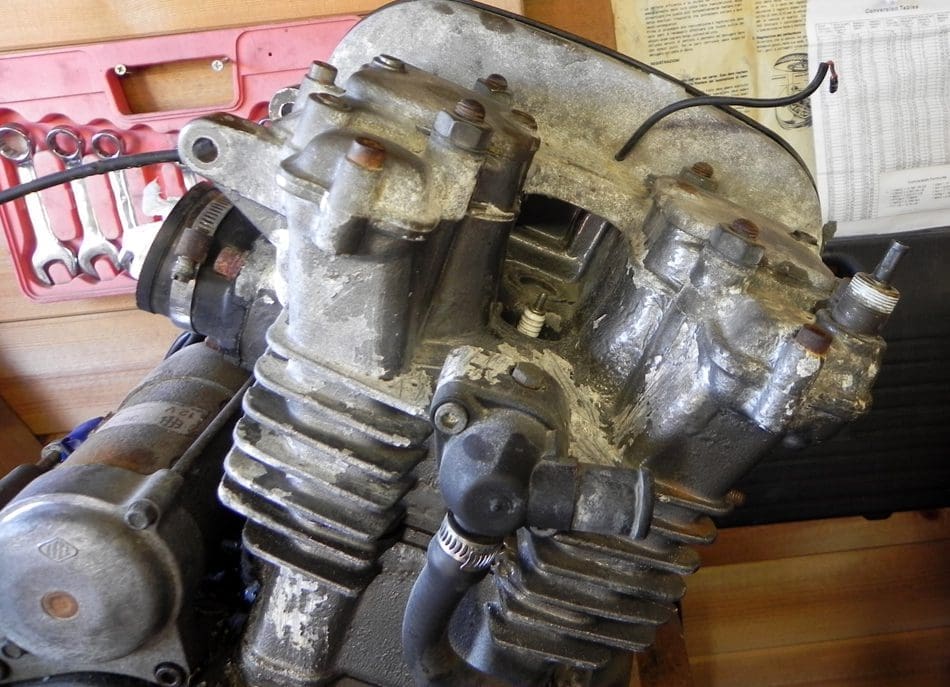
I decided to remove all the paint back to base metal, a time-consuming process of scraping and sanding to remove all the oxidisation. Then I lightly sandblasted the covers for etch primer and new paint. The recommendation for painting aluminium normally is to ensure the surface is abraded to give a key, clean with solvent, then use etch primer to key the paint and then primer or top coat.
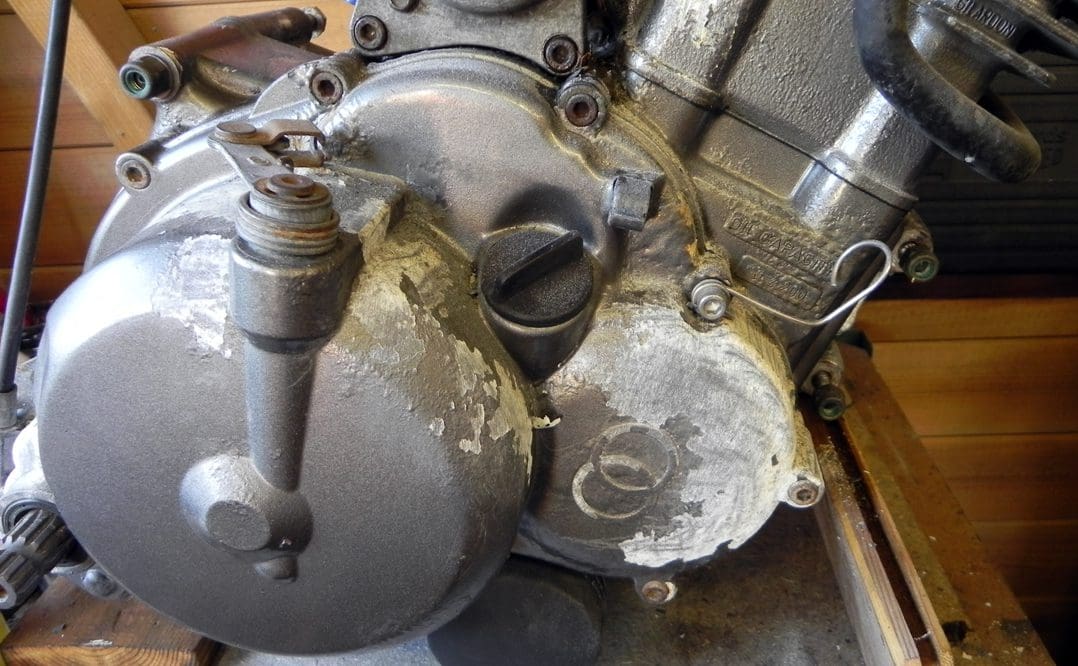
I finished the main engine body with heatproof fuel-resistant engine block paint, and the outer cases with 2k epoxy gloss jet black paint, so it could be touched up in future. This finish has turned out well on my previous rebuilds. It withstands the engine heat well on a water-cooled machine, and the black goes really well with the red. Even my little air-cooled Gilera (which gets pretty hot) still has its 2k paint firmly in place on the crankcase body after thousands of miles.
I made some gaskets from 0.3mm flexoid oil-proof gasket paper. We will see if they will seal the 10W/40 semi-synthetic oil, which is pretty thin.
Removing the clutch cover for pain was quite easy. Putting the cover back was not so easy. All the clutch, primary drive and balance shaft gearing components looked brand new, with all-locking washers as they’d left the factory. The manual suggested that assembly would simply be the reverse of disassembly…
I have never found that assembling anything is that easy. This is where the skill is required. Any fool can take things apart (and they do unfortunately, usually inflicting damage), but there are always tricks for reassembly, none of which are described in the manual. Old fashioned manuals showed these tricks in; like using blocks of wood with nails for alignment, and they assumed the owners carry out home maintenance with minimum tools.
On the Gilera, replacing the cover needed some thought. This entailed sitting down, looking at the various components, having a cup of tea, discussing the options with the imaginary cat (who never answers), giving the components a good stare (usually frightens them into submission and makes me feel better) and then working out how I thought it might be possible to fit it.
The spring on the kickstart shaft needs tensioning before the cover can go back on. But this spring is inside the casing, so it has to be initially hooked up without any tension, out of position. Then deft use of the kickstart lever turns the shaft (complete with ratchet and shaft stop-plate) through 180 degrees. There’s also with another actuating spring that needs to go into a slot… and there’s more than one slot! The casing has to be manoeuvred into place so the kickstart ratchet gear lines up with a gear in the gearbox, and the shaft into a bush within the casing. It’s all easier said than done and it took several attempts to get the assembly on properly so the valve lifter mechanism activates properly when the kickstart starts its movement.
All this for a kickstart, which I hope not to use…
Internet searches revealed that each of the several incarnations of the engine have different kickstart ratchet arrangements. Different model years and capacities have different locations for the various components, but there is an easier way to do it, YouTube has its uses! Thanks to those who have had similar issues and have taken the time to put the solutions out for all to see.
While I had the engine on the bench I rechecked the valve timing, set the engine on TDC (easy when there is a timing mark), and set the valve clearance. This was quite small at 0.05mm inlet and 0.1mm exhaust (2 and 4 thou) but easy to do as the valve clearance is set using screw and locknut. With the engine on the bench it was easily accessible, but when in the frame that would not be true!
I took the opportunity to give the radiator a good clean and noticed that there was a small hole developing. As the radiator is all-alloy, made in Austria,) I used the aluminium solder method. A sample pack of Durafix was £5 and is, according to the instructions, quite easy to use. As with all of these things it needs quite a bit of practice – not quite like Ronseal.
Looking the bike over, apart from the faded paint, and worn out tyres, the wear on the components was minimal. The odometer reading was probably correct at around 14,900km. I think I am the first person to do any real work on it: there’s no bodging (so far) and some of the bolts are rather difficult to remove, which suggests they’ve been there since it was first built.
NEXT TIME: electrics! Wheels! Paint!