It’s tin time. Tin is tough. Tin should not be damaged by fire. Frank Westworth discovers that you should never believe your own eyes…
One of the reasons I was happy to pay out five hundred of Her Majesty’s most excellent pound notes for what may appear to have been a pile of scrap (in this case, appearances were not deceptive) was because the toasted remnant had all of its tinware. Tinware, as everyone knows, is unobtainable by mortal man, and my thinking was that even if I couldn’t rebuild the Huntmaster, then I would surely be able to break it and sell the bits. I’d do that anonymously, of course; breaking motorcycles is something to which I am morally opposed. It says here, in my well-thumbed copy of Classic Clichés For The Clueless Scribbler.
But the pre-purchase pics of the Toaster revealed that it had all its tin, apart from the FERC*, which had been fibreglass and had therefore been consumed by fire. It may well be that my sanity had also been consumed by fire, but at the time I was blissfully unaware of this.
Enjoy more RealClassic Magazine reading every month.
Click here to subscribe & save.
And when fine previous owner (with a strangely cheery expression) delivered the fried remains, I was chuffed to see that it was as had been described; tinnily intact. Well. Sort of.
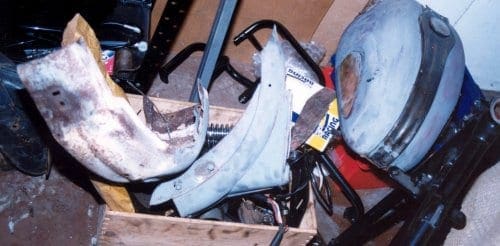
Stripping the bike revealed little untoward in the tin dept. No. I should rewrite that. Stripping down revealed little untoward because I didn’t look very hard. What I did was pile all the tin (fuel tank, oil tank, mudguards, toolbox, headlight nacelle, air filter and sundry fittings) in a big heap in the corner of The Shed. Big heaps are good. I like big heaps. When times are tough I can gaze upon big heaps and draw solace from the fact that there are loads of things in any given heap, and if the big heap is not a big heap of an electrical nature then I can anticipate the enjoyment derived from repairing, restoring and resurrecting – which is why we do this old bike lark, no?
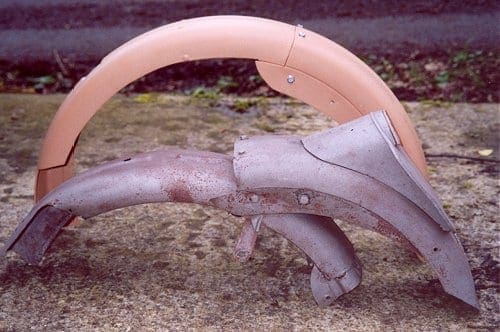
Sifting through the piles of scabby tin, some time later, revealed that fire had done cruel and unusual things to the tin as much as to the rest of the bike. The big thing I hadn’t noticed was that both mudguards had been heavily repaired, presumably while it was being rebuilt the last time. No problem, thought I; get the stuff blasted, brazed and coated, and it’ll be great.
One gloom-laden conversation with my favourite blasters and coaters later, on t’other hand, suggested that things were rather worse than I’d expected. I waddled over to Redditch, and discovered that everything was horrible! Not simply bad news, as expected, but ten times worse. I don’t know what had been used to blast the guards, but they were suddenly full of holes. The only things holding the front one together were the pieces of steel sheet which had been brazed in to fill the original rusted-out holes. Holes which had come back and which had indeed been improved due to vigorous blasting – which had also removed the filler, revealing the true state of play. The filler? you ask, remembering the fire. Well yes, the front end had survived almost entirely unscathed apart from paint damage, which is why I’d not realised how awful things were!
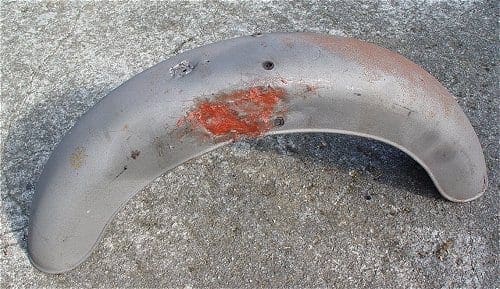
The main section of the rear guard wasn’t too awful; just full of holes along the edges, where fire and blast had removed the filler which had hidden the handsome doily effect. I sat and stared. Then I did what I usually do; head for the jumbles!
Which revealed that there are precious few Ariel guards out there, and those I could find were either as rotten as my own, wildly expensive, or indeed both of those. I scratched my head more and stared some more.
A seriously friendly gesture from the Ariel OC’s most handsome and Square Four riding Treasurer found me with a glassfibre repro rear guard, as well as a similar FERC. Thanks, Derrick; you kept me going through the rebuild’s darkest hour.
Then I suffered two strokes of what passes for genius in this household. First, there’s a man who sells new repro steel guards at John Budgen’s excellent Cheltenham jumble; I would go take a look and see what they were like.
Second, my local garage repairs car bodywork (they once rebuilt an entire Land Rover for me to write about, in fact); maybe they could repair and repaint the guards?
Nice man at the next Cheltenham bash had a late Ariel front guard. It looked grand, and I bought it, ordering a rear while I was at it. Hurrah! Things were looking up. And my local garage were perfectly capable of patching and painting my originals, and would be happy to do so. Hurrah again!
Meanwhile, I got to grips with other tinny things, like the toolbox and the headlamp assembly. And once again discovered the importance of preparing items to be refinished properly. Tradesmen will generally do what you ask them. They will for example blast and coat a tool box as one item unless you take the lid off it. I didn’t… I am a madman. There is of course no real problem in fixing this after the coating is on, but it is more difficult than getting it right first time!
No probs with the headlight assembly, though. Looks glorious.
Time passed, as it so often does, and I had lots to do which did not involve time in The Shed. So many restorations stop when Proud Restorer needs to do other things, and many of them stop for good. I was disheartened, to tell the truth, and more than once decided to give up and just buy an Ariel which … you know … worked. Then the new rear guard arrived. It looked awesome! It weighed several tons! It was brand new! Fired with vigour, I headed to The Shed and decided to offer up my new guards straight away, before zapping off to get them coated.
Disaster! The new guards didn’t actually fit. Strewth, and other bad words. Although visually almost identical to the originals, neither front nor rear guards would line up with the bike’s original brackets, and although they were truly beautifully made they would need more facilities than I have available if they were to fit. And we were moving house! And we had changed jobs! And … all was gloom.
Things did not improve when I shambled over to my local garage to discover that they had been unable to get around to the brazing and painting stuff despite several months of promises and it being (for them) just a couple of hours work. My original guards were just rusting away. More gloom. And I did not want to fit non-stock guards. I wanted the bike to be as stock as I could make it; this was all part of the challenge.
Moving house by several hundred miles inevitably dumps you in a part of the world where you know no-one. And so it was. Losing The (old, familiar) Shed didn’t help, either. My parts were all over the place, if you know what I mean.
And so I went off hunting for car body fillers, recalling that at one distant time I was quite good at bodging car wings for profit (don’t ask). If I was going to resort to bodgery … well, why not? After all, once I find local facilities I’ll be able to get new brackets made up to fit the new repro mudguards…
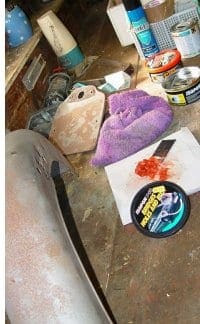
Isn’t bodging fun? Hasn’t car body gobbo improved in the last two decades? Have you tried the Isopon which comes with ready-chopped, ready-mixed glassfibre mat? Amazing. Filled all the holes in a trice! And the Better Half’s orbital sander flatted and finished the filler with no real effort! This was loads better than I’d remembered from the 1970s. Why had I not thought of it earlier? Because I am an idiot. It all comes back to this: I really have no brains. And I am easily pleased…
Loads of filling, loads of sanding. More filling, more sanding. Aerosol primer and more sanding. More primer, more sanding. The first top coat. Amazing blackness. More paint. More paint. More paint. Two big aerosols on the front guard alone and we started to get a gloss. And a grin.
Offer up the front guard to its original brackets. It fits (well, it should). Offer the whole lot to the bike. It fits that, too (ditto). Stand back. Smile. It looks like a truly amateur job, and indeed it is, but remember what the word ‘amateur’ actually means. Smile some more.
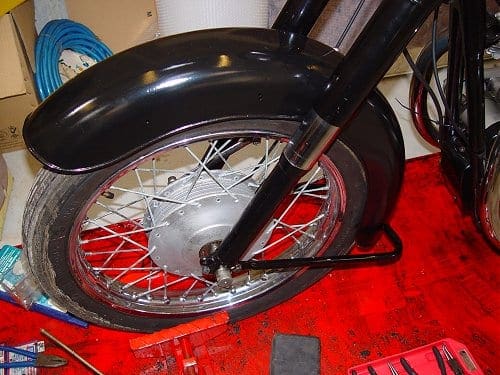
Repeat the process with the main part of the rear guard. Smile a lot more. Remind self that the rear mudguard tailpiece does actually need brazing (because the valances have detached and it’s hard to stick one paper doily to another – although I may try!), and I cannot braze, but I’m sure I’ll find a local man who can, and then… and then …
and then it’s just the wiring, and the fitting of the peripherals, and the first ride.
Who am I kidding?