Enjoy more RealClassic Magazine reading every month.
Click here to subscribe & save.
A damaged mounting can mean the end of an original component’s useful life. Alan Goff didn’t want to throw away the tank badge for his Triumph T90, so set about fixing it…
I also own ‘Puddle Jumper’ a Triumph T20 Tiger Cub (seen on RC before at www.real classic.co.uk/newsfiles/news08101700.html), and recently acquired one of the last Triumph Tiger T90s ever made.
The 350cc T90 was in original condition and needed a little bit of work to get it through the MoT, like changing the oil, renewing the wiring loom, fitting new cables, battery and a bit of a clean. When I removed the tank styling badge to polish and clean the petrol tank, I found that one of the two screw holes on the plate were slightly damaged. The holes were oval holes and out of line compared to the tank threaded holes.
If the screw holes on your bike are damaged or you have cracked holes on a casting, then this method of repairing them works well instead of buying costly replacements parts. It also means you can retain a bit more of the bike’s originality.
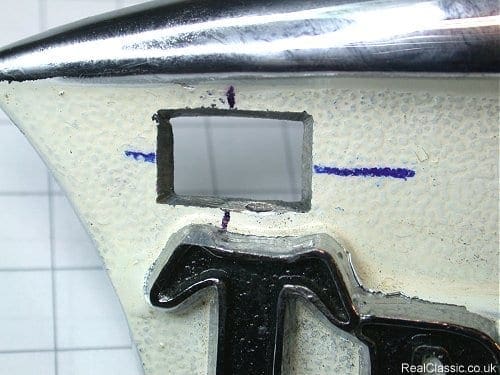
First mark horizontal centre line of screw hole (blue line on pics).
Using a needle file, file out a rectangular slot with tapered sides (like a wedge).
The original hole was in line with the middle of the letter T
Mark the position of vertical centre line of the threaded screw hole in the petrol tank (the black line), after first screwing in another screw through the badge and the other threaded screw hole in tank. The new hole to line up with tank is slightly to the left of centre of the letter T. I have no idea why it was out of alignment!
A piece of aluminium three or four times the length of the slot, as it Is easier to hold in a vice while filing first one end (say the right side), taper to fit then the two long sides (top and bottom)after three sides filed carefully measure and mark position of new screw hole ,then drill and counted sink. Cut over size on length then file fourth side to fit (left side).


Completed new piece of aluminium wedge with countersunk hole.
When happy with the fit, a spot of superglue to hold into place.

Paint as necessary. Good as new!
Paul Goff is on the interweb: www.norbsa02.freeuk.com