Last time, Ric Campbell started the restoration of a really rather ratty BMW airhead. Now to inspect the engine and gearbox, and then tackle the electrics…
Words and photos: Ric Campbell. Archive images: RC RChive
Whilst repairing the BMW I kept a list of what I did and I just had another look at it. My goodness, the cost! I try to re-use as much as possible without skimping the job or leaving something unsafe. The easiest thing in the world is to sling out anything that looks remotely dodgy and buy a new one. The trick, I suppose, is to keep things within limits, and repair where possible.
Enjoy more RealClassic Magazine reading every month.
Click here to subscribe & save.
This leads me to a point I find hard to understand; when all the costs of components and time are added up, how can anyone make a living out of restoring motorbikes? If I break even then I am happy, but this isn’t always possible and you can get caught out by the more unscrupulous characters that live among us.
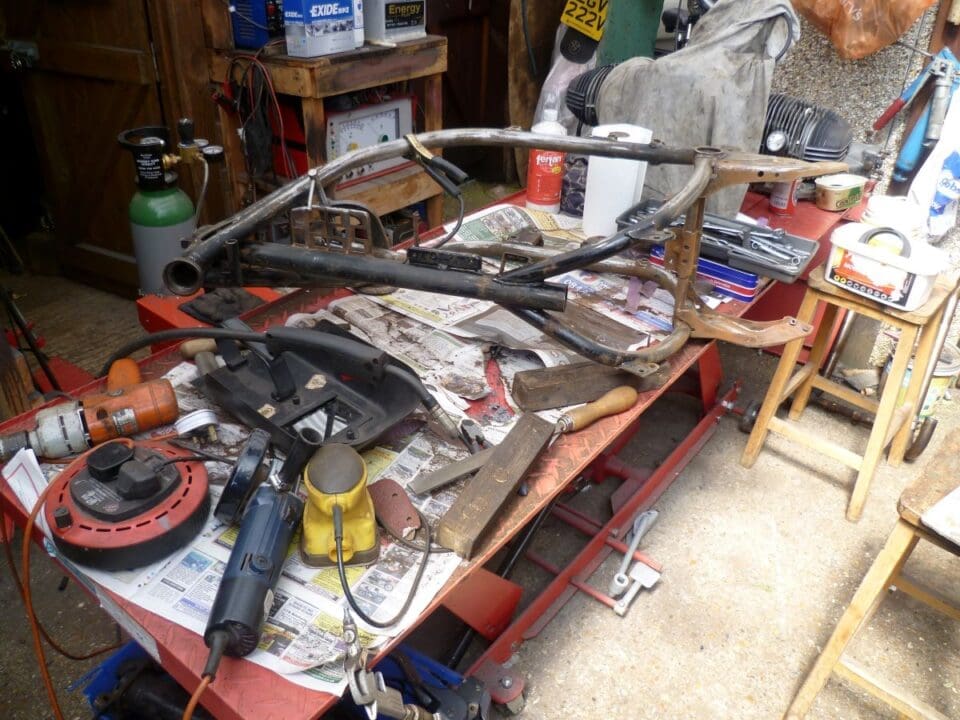
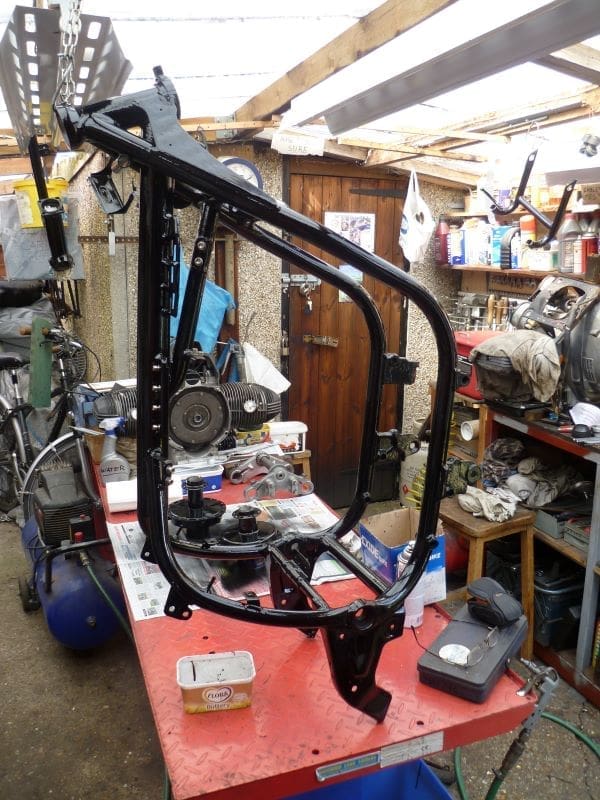
The R65 was stripped down to the frame. No nasties were apparent; everything seemed to measure up with no bends, dents or extra holes or bits welded on. Off with all the paint and rust and treat with Fertan, just the thing for rusty bikes. Then on with the primer, undercoat and top. The painting job is very time-consuming and is why many people resort to the sand-blaster. I like to do as much as I can myself, right or wrong.
Tinwork damage is another interesting part of the job. Get hold of some panel-beating hammers and dollies. As with welding you need lots of practice. Nobody says you have to be an expert, but it’s surprising what you end up doing.
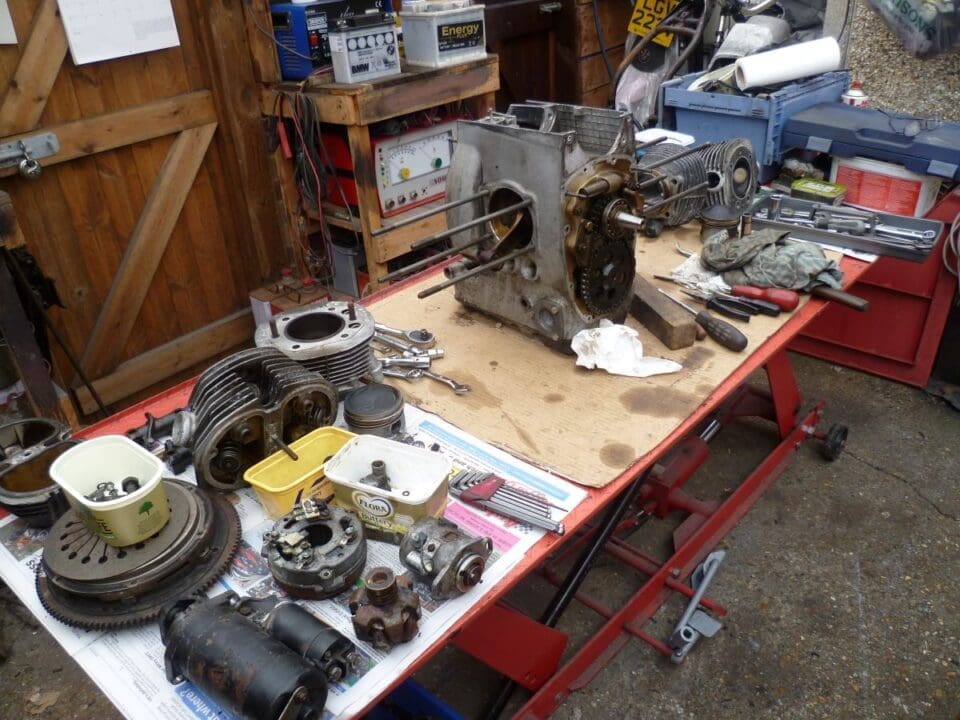
The BMW engine required very little. The rings were worn with plenty of carbon in the grooves. Rumour says that leaving these bikes on the sidestand for long periods allows oil to enter the bore on the near side. Indeed there are instances where the near side barrel does smoke after starting so it may well be true. This could very well explain all that ring groove carbon: has anyone else come across this? I tend to leave my other boxer, an R45, on its centrestand.
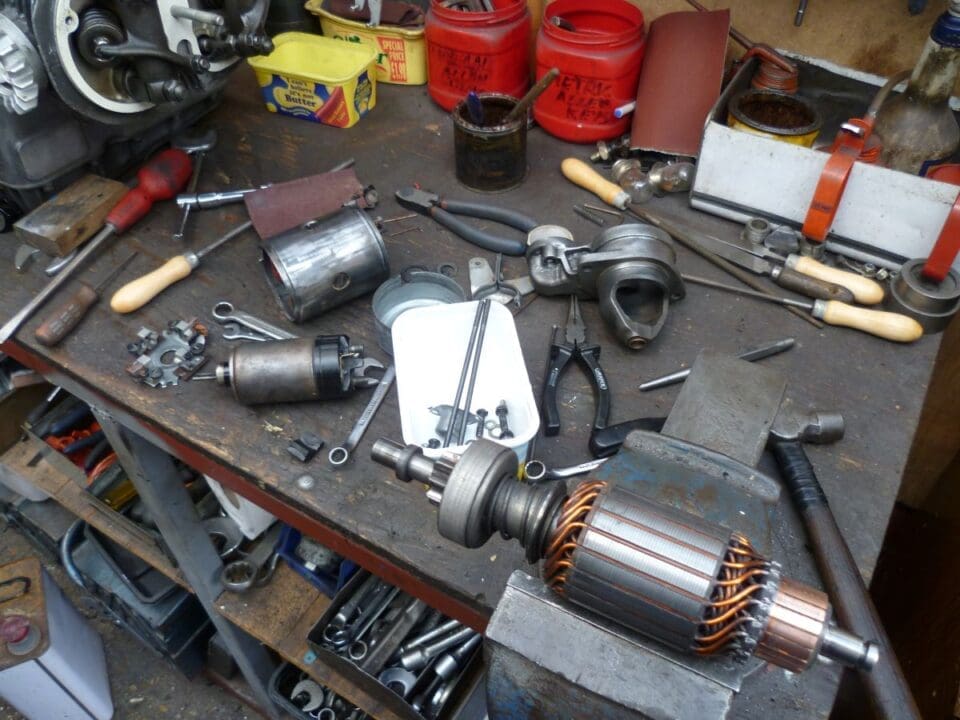
The engine was given a good clean up and I replaced all gaskets and seals. I took the alternator to bits, a good old Bosch one, very robust. I cleaned the slip rigs on my lathe and soldered in new brushes. The starter motor is very straightforward: a pre-engage one like on a car, no complex ingenious starter clutches here. The only problem was an open circuit solenoid, probably the reason why it was taken off the road, cured by a secondhand one from Motorworks.
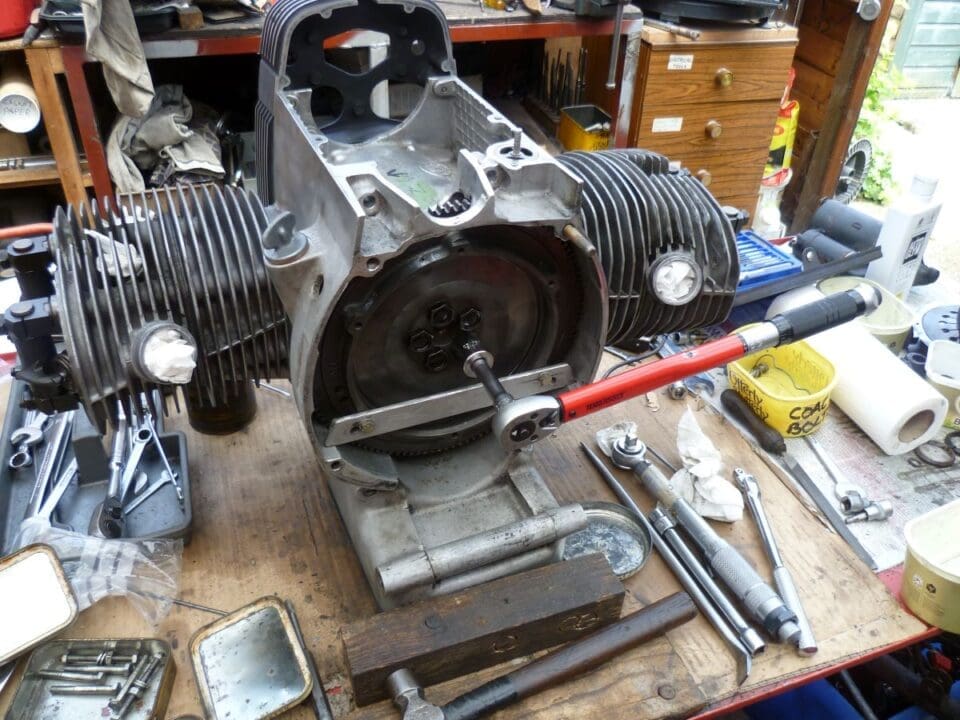
With these engines it’s worth taking time tom accurately shim the rocker shafts. Even a small amount of movement here results in much clattering, all very un-BMW. Another source of noise can be a worn timing chain tensioner, not expensive and easy enough to replace.
The gearbox was OK; all the gears could be selected so I just replaced the input and output seals. Off comes that flange plus the selector shaft seal, and don’t forget the copper washer on the bolt holding it in. It’s well worth checking the start/no start switch while the gearbox is out beacue it’s a bit of a fiddle with the box in.
The clutch also had plenty life left in it. This unit is a substantial bit of kit; a single dry plate and a diaphragm spring which would take some wearing out. Don’t forget the special BMW grease on the splines from Motorworks. Apparently if you don’t use it you can end up with problems later on with sticking splines. This may be a myth but I wouldn’t like to find out the hard way.
The bike had turned up with no keys. I thought little of this (like a mug) until I started on the electrics. You can get a secondhand key and lock barrel but it’s not cheap. Then comes the added misery of having a locking petrol cap (more of this later).
What is it about motorcycle electrics? These had been got at with a vengeance. As this was a later model, all the various colour-coded relays and wiring multiplugs were mounted on a plate, welded to the frame. This is a huge leap forward from the earlier bikes which have everything, including the kitchen sink, shoe-horned into the headlamp shell. I have an R100 RS with just this absolutely silly arrangement, all very well until you try to get the headlamp back in.
On the R65 the whole shabby, taped-up and bodged mess (I can’t bring myself to use the term ‘loom’), was removed. All the tape and plastic sleeving that had gone hard was stripped off. Years ago we used bullet connectors: you soldered a brass bullet onto the wire end and by use of the ingenious little pliers provided just for the purpose you joined wiring using insulated metal sleeves. These were not fool-proof; they could and did after a number of years corrode, but they were easy to replace.
Now you get little plastic multi-plugs. These also corrode and you need a panoply of little special tools to remove the various pins and sockets. Of course these are not usually soldered but crimped. By the time you have removed the old corroded parts and tried to solder new ones on to the black corroded copper wire, your loom is not as long as it once was.
I don’t usually resort to a new loom. Again it’s all part of the fun; repair as necessary, replace corroded and broken wiring and wrap the whole lot up with non-sticky loom tape. You can seal the various ends with rubber self-amalgamating tape.
The mechanical Bosch regulator appeared to be in very good nick, once the cover was prised off. Back it went and worked perfectly. I find that little touches like painting the cover adds to the overall effect, rather than just leaving it a nice shade of rust.
NEXT TIME: what horrors lurk within the petrol tank? And what’s going to stop it? And will it start?